
At a glance
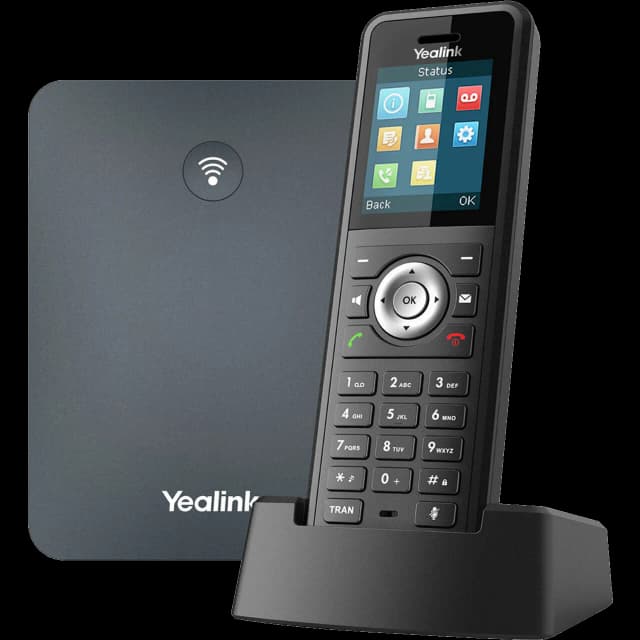
- Best for
- Industrial/warehouse spaces
- Highlights
- Rugged IP67 rating
- Waterproof & dustproof
- Built in Bluetooth
Quick start
Get your Yealink W79P Bundle up and running in minutes.
Unbox and connect the base station
Remove the rugged handset, base station (W70B), charging cradle, Ethernet cable, and power adapter.
Connect the Ethernet cable from the base station to your network.
Plug in the power adapter. The base LED turns green when ready.
Auto-provisioning takes 1-2 minutes.
Pair the rugged handset
Charge the handset fully before first use (~3 hours).
The handset should auto-pair. If not, press the base pairing button for 5 seconds.
On the handset: Settings > Registration > Register Handset.
Your extension appears on screen when paired.
Test your phone
Make a test call to verify audio.
Test the range — the W79P covers up to 164ft indoors / 984ft outdoors.
The IP67-rated handset is waterproof and dustproof — perfect for warehouses, kitchens, and outdoor use.
Key features
IP67 rugged rating
- The handset is fully waterproof (submersible to 1 meter for 30 minutes) and dustproof.
- Designed for industrial environments — warehouses, kitchens, construction sites, loading docks.
- Shock-resistant housing protects against drops.
Built-in Bluetooth
- Pair a Bluetooth headset for hands-free use in loud environments.
- Go to Settings > Bluetooth > turn on > scan for devices.
- The handset remembers paired devices and auto-reconnects.
Common tasks
Step-by-step instructions for the most common phone operations.
Check & set up voicemail
Press the Message button on the handset, or dial 5001, then follow the voice prompts.
The default voicemail PIN is 1234 — you'll be prompted to change it and record your greeting.
Check voicemail remotely: call your own extension until it reaches voicemail, press the * key, then enter your PIN followed by the # key.
Prefer the web? Log into talk.simplefiber.com and open the Messages tab to listen to, download, delete, or forward your messages.
Send voicemail to email
Voicemails can be emailed to you so you can listen on your computer or smartphone.
Turn it on in the portal at talk.simplefiber.com under Voicemail > Email Notification.
We recommend the "Send w/ attachment, move to trash" option so each voicemail emails to you and clears off the handset.
Transfer a call
Blind (unannounced): press the Transfer button, enter the extension or a 10-digit number, then press Transfer again or hang up to complete.
Attended (announced): press Transfer, enter the number, wait for them to answer so you can announce the call, then press Transfer again or hang up to complete.
Transfer straight to voicemail: press Transfer, dial 03 followed by the extension, then press Transfer again.
Set up call forwarding
To turn forwarding on, dial *72 followed by the extension or remote number you want your calls sent to. You'll hear "Forwarding is now active."
To turn forwarding off, dial *73. You'll hear "Forwarding is now disabled."
To forward your company's main number, log into the portal at talk.simplefiber.com — Manager permissions are required.
Park & pick up a call
Park is system-wide — a call parked from one phone can be picked up at any phone in your office.
To park: press the * (asterisk) button three times. The system tells you which park queue the call is in.
To pick up: from any phone, dial the park queue extension (701, 702, or 703) and press Send.
Tip: save the park extensions (701–703) in your handset directory so you can pick up a parked call with one tap.
Conference / 3-way call
While on an active call, press the Conference button.
Dial the extension or 10-digit number you want to add and wait for them to answer.
Press Conference again to join everyone into one call.
Intercom
Two-way intercom: dial 08 followed by the extension, then press Send. Both phones beep and connect for a quick two-way conversation.
Common issues & fixes
Try these solutions before calling support.
No dial tone / phone won't register
Check that the Ethernet cable is firmly connected to the LAN port on the phone and the wall jack or switch. Verify the phone has power (screen should be lit). Try rebooting the phone by unplugging the Ethernet cable for 10 seconds and reconnecting. If the phone still shows 'No Service' or fails to register, contact SimpleFiber support — we may need to re-provision your phone.
Poor call quality / choppy audio
First, run a speed test at fast.com on a computer connected to the same network. If speeds are low, the issue may be your internet connection. Make sure the phone is connected via Ethernet (not WiFi) for best quality. Check that no one is running large downloads or uploads during calls. If the issue persists, contact us — we can prioritize voice traffic on your connection.
Can't hear the other party / one-way audio
Reboot the phone by unplugging the Ethernet cable for 10 seconds. Check that you're not on mute (mute icon on screen). If using a headset, make sure it's properly connected and the audio path is set to headset. If the problem continues, contact support — it may be a network or firewall issue.
Phone keeps rebooting or restarting
Check your Ethernet cable — a loose or damaged cable can cause power cycling on PoE phones. If using a power adapter, make sure it's the original Yealink adapter (third-party adapters can cause issues). If connected through a PoE switch, verify the switch provides enough power. Contact support if reboots continue.
Voicemail not working
Try dialing 5001 directly to reach your voicemail. Make sure your voicemail PIN is set (the default is 1234). If calls aren't going to voicemail, make sure call forwarding isn't on — dial *73 to disable it — or review your answering rules at talk.simplefiber.com. Contact support if you need your voicemail box reset.
Handset says 'Searching' or won't pair with base
Press and hold the pairing button on the base station for 5 seconds. On the handset, go to Settings > Registration > Register Handset. Power cycle both devices if needed.
Related guides
Yealink W73P Bundle
Best for office users/retail shops
View guideYealink W73H
Best for office users/retail shops
View guideYealink W59R Pro
Best for industrial/warehouse spaces
View guideCordless phone features user guide
Voicemail, transfers, call forwarding, park, and more for SimpleFiber cordless phones (W73P and other W-series handsets).
View guide
Still need help?
Our support team is here for you. We'll get your phone working right.